INTRODUCTION
A 48V inverter solar system is a reliable, effective way to power homes or commercial spaces. It is perfect for off-grid solar systems or hybrid solar systems. Either you are setting up a backup power system or switching completely to solar power. In the case of any system, correct wiring is a must for the performance and security of the system. The optimal design of the system ensures low loss of electrical energy and a stable voltage, which in turn, ensures the long-term reliability of the 48v panel solar system. The main idea is to understand the 48 volt solar panel wiring diagram before installing it. You can follow this blog article to wire and connect a 48V solar panel system.
Why Choose a 48V Solar Inverter Setup?
The 48v solar invert system is considered best suitable for medium and large-scale generation as it reduces the current flow and provides the same surge. When the current output reduces, the heat generated reduces, the size of the cable required reduces, and the efficiency increases. The 48 v inverters for solar panels proved to minimize the power loss over longer distances. Thus, it becomes ideal for distant connections from inverters or battery banks.
Besides, these 48 volt inverters for solar panels are built to withstand a higher power load, making them more suitable for residential use. Such inverters are highly suitable for appliances found in residential places like refrigerators, air conditioners, and water pumps. Furthermore, they are also applicable for light commercial set-ups. The inverters also reduce the strain on the batteries, thereby increasing the life and the overall safety of the inverters.
The inverters of the recent 48 volt inverter and charger models are compatible with MPPT charge controllers and LiFePO4 batteries. The compatibility of the new 48v solar inverters paves the way for better charging and better understanding of the stored energy. A 48-volt inverter and charger system also helps to maintain voltage stability, thus ensuring consistent performance in any load condition.

Key Components of a 48V Solar Inverter Setup
A 48V solar inverter system is made up of carefully selected components like 48V solar panels, 48V sine wave inverter, 48V LiFePO4 battery bank, and 48V-rated accessories, supposed to be used to get an efficient 48V solar inverter setup.
The main source to generate power for the hybrid inverter 48V is 48V solar panels. Solar panels help in the collection of electrical energy by absorbing sunlight. Solar panels convert this electrical energy into direct current. The solar panels are wired in a series or parallel, or a combination of both, suitable to achieve the voltage required for the 48V-rated hybrid inverter setup.
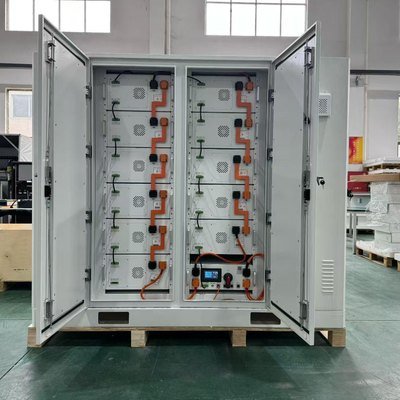
To store power, a 48V LiFePO4 battery bank should be used. LiFePO4 batteries are a rechargeable form of energy source with high energy density, long cycle life, and safety properties. LiFePO4 batteries are designed to produce a nominal voltage of 3.2 volts per cell. To get a 48V output, 16 LiFePO4 cells are required to be wired in series.
A 48V pure sine wave inverter is required for a 48V off-grid solar inverter system to be utilised. The energy stored in the batteries is DC and can power any appliances, but all the home or commercial appliances are AC rated. For converting the DC power to household or commercial electrical energy, a sine wave inverter should be used.
To control the flow of power from solar arrays to the battery bank, the use of a 48V-rated charge controller is essential. Better to use the MPPT type charge controller than any other to improve the charging efficiency. The charge controller takes care of the charge/discharge cycle, charging of fast and slow batteries, and battery protection.
The use of breakers, fuses, and wiring connections rated for 48V should be used for the safety measures. And, 48V accessory equipment should be used to avoid any malfunction due to overcurrent or short circuit. Anything below these specifications may undergo malfunction due to overcharging or short-circuiting.
Understanding the 48 Volt Solar Panel Wiring Diagram
One of the most important aspects of a solar installation is the wiring. A 48V solar panel wiring diagram is necessary to wire solar panels to the correct voltage needed for the system. The majority of the residential solar panels are 12V or 24V.
For example, you will need to wire the panels in the sequence to produce a voltage of 48V with 4 numbers of 12V panels. To increase the voltage while keeping the current constant in a series connection, four 12V, 200W panels can be connected in a series (positive to negative) manner.
After the series connection, you will get a total of 48V/800W. You need this voltage to match your battery bank and inverter input. Wiring solar panels in series is essential for an efficient and compatible installation. Suppose you are using 24V panels. You will need to connect only two panels in series to reach 48V.
| Panel Voltage | Qty in Series | Total Voltage |
| 12V | 4 | 48V |
| 24V | 2 | 48V |
But if you wire in parallel, that will increase the current, but the voltage will still be the same. It isn’t suitable if you want to raise the voltage and want 48V. Keep the output of the solar panel array similar to the input voltage of both your inverter and charge controller.
If you want, you can change to the 48-volt solar panel wiring diagram pdf to view the layout. Please make sure also that your 12V 48-volt battery wiring diagram mirrors your panel configuration, so you don’t have inefficient wiring or a mismatch.
Safety is critical. Never mix panel types, and always use panels with an identical voltage and current rating. You can drop energy and break equipment if you mix different panels.
Always disconnect the system and switches of any power supplies before you start working with any wiring.
How to Wire 48V LiFePO4 Batteries Correctly
In a 48-volt solar system, battery wiring is equally essential to ensure efficient output stability. In a 48V bank, there is a need to fix the batteries in series to get the desired voltage. In series wiring, the voltage increases, and the amp-hour capability of the combined batteries will be the same. Hence, even after combining four 12-volt LiFePo4 batteries of 100Ah in series of 48V, 100Ah is the output of the combined battery. Therefore, 48V is the perfect configuration for connecting to the charge controller and a 48v all in one inverter.
Every battery needs to have the same voltage, capacity, and manufacturer. Using mixed batteries can lead to hazardous uneven charging and shortened lifespan. A manufacturer mismatch of a battery can cause one or more batteries to shift to overcharge/deep discharge. Also, a battery mismatch should not create a safety hazard or system inefficiency.
Balancing the LiFePO4 cells within each battery and across the entire series string is as vital. Also, using a smart hybrid inverter 48v that has built-in battery management will prolong the battery life.
When connecting the batteries to a charge controller, all connections must be made following the polarity rules, and a fuse should be attached to each battery line. It will secure you if a short circuit or a fault occurs. For this setup, 12v 48 volt battery parallel connection, referencing the 12v 48 volt battery wiring diagram ensures the batteries are connected in the correct sequence.
HBOWA 48V LiFePO4 batteries are a reliable option for these configurations. Their consistent voltage production and extended cycle life make them well-suited to demanding solar storage applications, primarily in residential and light commercial settings.

Step-by-Step Connection Process of a 48V Solar Inverter System
Wiring a 48v inverter solar system involves several technical steps such as;
- Mount the solar panels in the location where they will capture the most sunlight. Ensure that the mounting structure is strong enough to support the panels and keep them at the orientation needed for maximum output.
- Connect the solar panels in series. This will increase the total voltage output of the panels to 48V required to run the inverter and charge controller. As an example, if you have four 12V, 200W panels, connecting them in series will produce 48V, 800W worth of power.
- Next, connect the panel output to a 60A MPPT charge controller. An MPPT charge controller will adjust the voltage as needed to make the solar input more effective. These controllers are particularly useful when the solar input voltage can vary greatly throughout the day.
- Now, connect the battery bank. For a 48V, 100Ah configuration, you could use four 12V, 100Ah LiFePO4 batteries connected in series. Ensure you have thoroughly checked the polarity of the batteries and always use fuses between the wire and its fuse.
- Connect the charge controller to the battery bank. Ensure all connections made in this step follow the correct polarity. Use a suitable wire (100A rating is a must) to connect the controller to the battery bank. Also, place a breaker between the charge controller and the battery, so it can be taken out of the loop when the batteries need maintenance.
- Next, connect the battery bank to the inverter. Ensure you are using an inverter powered for a 48V solar system of the size you are constructing. For our example, you would want to use a 48V, 3000W inverter. Place a circuit breaker or fuse rated to handle any potential load to protect the rest of the system in case of a short circuit or overload.
- Then, connect the inverter’s output to your load or household AC panel. For a 48V DC to 120V AC inverter, be sure your appliances can accept that kind of power.
- Finally, use your measurement tools to test the system. Check the voltage across each major connection.
Example setup:
Panels: 4 x 12V 200W (800W total)
Battery Bank: 4 x 12V 100Ah = 48V, 100Ah
Charge Controller: 60A MPPT
Inverter: 48V 3000W pure sine wave

The solar system can power up to 1.5 tons of inverter AC, refrigerator, colourful LED lights, and ceiling fans. The solar system is perfect for off-grid cabins or as back-up power for grid-connected homes.

You can refer to a 48V solar panel wiring diagram PDF to understand how to connect and confirm the configuration details. A good and well-designed schematic will prevent errors and yield good performance under load.
Real-Life Example and Case Study of a 48V Solar Inverter Installation
In a rural house, the owner was facing grid failure every day, so he installed a 48V inverter solar system for an uninterrupted power supply. He had installed a 48V 3000W inverter, a 4kWh HBOWA LiFePO4 battery bank, and a 960W solar array with four 240W panels.
This system supports a couple of ceiling fans, a refrigerator, four LED lights, and a laptop being used for 10 hours a day. The 48 volt solar system gives out a stable power output, and the inverter runs without any overload faults under typical household conditions.
He got a return on investment in just 18 months as compared to the diesel generator cost. The maintenance and fuel costs are also decreased with the use of a solar system.
Common Mistakes to Avoid in 48V Inverter Installations
There are some complexities involved in a 48V inverter solar installation. The following are those common errors that, left unnoticed, can cause permanent damage to your electrical appliances and inverter system if they happen repeatedly. The table below identifies the errors as well as how to prevent those mistakes.
| Critical Mistake | Technical Consequence | Prevention |
| Mixing battery types/ages | -Cell imbalance → 40% capacity loss | Use identical batteries: -Same brand -Capacity |
| No DC fuses/breakers | -Catches fire during faults (NEC 690.9) | -Install correctly rated protection on all circuits |
| Reverse polarity wiring | -Instant MOSFET/IGBT failure | -Verify +/- with multimeter |
| Solar panel-controller mismatch | -Undercharging/shutdown (e.g., 150V array → 100V max controller) | -Match VOC < controller max input (allow 20% cold margin) |
| Improper grounding | -Electric shock risk (violates NEC 690.43) | -Bond all metal parts -Use <25Ω earth electrode |
| Overloading inverter | Thermal shutdown → premature failure (e.g., 4000W on 3000W unit) | -Size inverter 20% above continuous load -Check surge ratings |
Comparison Table – 12V vs 24V vs 48V Inverter Setups
According to the preferred choice of inverter voltages, the correct inverter system can be selected in a particular situation. The 48 volt power inverter system has clear advantages in terms of efficiency and wiring requirements.
In a 12V setup, the current flow is high. This high current flow results in a significant voltage drop and thereby sacrifices the performance. This means that to reduce the voltage drop, thicker cables are required. These setups are usually limited to inverters of 1500W or smaller.
The 24V systems can also be used as a middle balance, but there are still limitations for higher than 3000W loads.
The 48V inverters generally operate with a lower current for the same power output. This effect reduces energy losses and allows the use of thinner wiring solutions. These systems can typically support larger inverters (3000W or more) and are best suited for high-demand situations.
Here is a comparison:
| Parameter | 12V | 24V | 48V |
| Voltage Drop | High | Medium | Low |
| Wire Size Needed | Large | Medium | Small |
| Max Inverter Wattage | Up to 1500W | Up to 3000W | 3000W+ |
| Efficiency | Low | Medium | High |
| Ideal For | Small RVs | Small Homes | Homes & Off-grid |
A 48 volt solar system is more scalable and cost-efficient for residential and commercial needs.
Conclusion
To conclude, setting up a solar system for a 48V inverter has its own advantages, like being highly efficient, having less voltage drop, and accommodating large loads well. It is suitable for medium and large-scale solar power systems for off-grid and hybrid systems.
Having the right setup and the right 48 volt solar panel wiring diagram will have a vast impact on ensuring safety and efficiency. Wiring and using components as per the standards can avoid any faults in the system and ensure a long life.
Hence, using a reliable battery like an HBOWA 48V LiFePO4 battery bank can be delivered several thousand cycles without a drop in its performance. A well-planned and wired 48V inverter system will give us solar power safely for many years.